
How to Record Seed Harvest Dates and Sources
Quick Summary
Record seed harvest dates and sources on the same day you collect the seed, in a simple log with a batch ID for each harvest. Write the collection date in one consistent format, such as MM/DD/YYYY, and note where the parent plant grew. Label each jar or envelope to match the log entry.
- Write the collection date on the same day you harvest the seed.
- Use one consistent date format, such as MM/DD/YYYY, so records sort easily.
- Give every harvest its own batch ID, using a pattern like year plus a running number.
- Record the source: supplier, donor, or the bed and row where the parent plant grew.
- Mark hybrid seeds clearly, since they may not grow true to type.
Table of Contents
- Why Seed Harvest Dates and Sources Matter
- What Information to Record for Every Seed Harvest
- Step 1: Set Up Your Seed Storage Log
- Step 2: Record Seed Collection Dates at Harvest
- Step 3: Document Seed Sources and Provenance
- Step 4: How to Label Saved Seeds
- Building a Seed Inventory Template You Can Reuse Each Season
- Start Your Seed Harvest Log With the WALERICA Kit This Season
- Frequently Asked Questions
How to Record Seed Harvest Dates and Sources
Last Updated: November 19, 2026
Why Seed Harvest Dates and Sources Matter
Seed harvest dates and sources are the two details that turn a jar of seeds into a usable collection. Without them, you may not know when to plant, which seeds performed best, or where your seeds came from. Recording both takes only a few minutes per harvest, and it saves hours of guessing later.
Seeds often get stored with no notes, and a year later nobody remembers what they are. Good seed records fix that.
Dates tell you how fresh your seeds are. Sources tell you how the variety was grown and whether it is likely to grow true to type. Together, they help you decide which seeds to keep, which to share, and which to retire.
What Information to Record for Every Seed Harvest
Every seed harvest should capture a small set of core details. Keep this list short so you actually use it.
- Variety or crop name: For example, "Cherokee Purple tomato" or "Kentucky Wonder pole bean"
- Harvest or collection date: The day you collected the seed
- Source location: Where the parent plant grew, such as "back bed, row 3"
- Parent plant notes: Health, vigor, and any traits you want to keep
- Quantity: Approximate seed count or weight
- Storage location: The jar or envelope number in your organizer
Many gardeners also add a batch identifier, which is a short code that links the seeds to one harvest event. This makes it easy to combine or split seed lots later.
Step 1: Set Up Your Seed Storage Log
A simple log is the foundation of good records. You can use a notebook, a spreadsheet, or the notebook included with the WALERICA Seed Storage Organizer Kit.
What you need:
- A notebook or spreadsheet
- Labels for jars or envelopes
- A pen that writes clearly on paper and labels
Set up your log with these columns:
- Batch ID
- Variety name
- Collection date
- Source location
- Notes
- Storage slot number
Keep the log in one place. Update it at every harvest, not weeks later.
Step 2: Record Seed Collection Dates at Harvest
Record the date on the same day you collect the seed. Waiting makes the date harder to remember and easier to get wrong.
Follow these steps each time you harvest:
- Write the collection date in the log using the same format every time, such as MM/DD/YYYY.
- Note whether the seed was fully mature when collected. Mature seed is usually dry and hard.
- Write the date on the seed envelope or jar label.
- Note any weather or unusual events that could affect the seed, such as a late frost.
Consistent date formats make your records easier to sort and search later.
Step 3: Document Seed Sources and Provenance
Provenance means where a seed came from and how it was grown. You can see how to organize seeds with envelopes and labels to keep each source traceable from harvest to storage. Recording it helps you judge seed quality, track varieties over time, and decide which seeds are worth replanting. A useful record separates the different kinds of source information so you can trace a seed lot back to a specific plant or supplier.
Record these source details, and keep them distinct:
- Supplier or donor: The seed company, seed swap, friend, or seed library the original seed came from. Note the supplier name and, if available, the catalog or lot number printed on the packet.
- Parent plant: Which plant you collected from, if you saved the seed. Use a plant tag or row marker so you can identify it later.
- Population or variety: The named variety and whether the seed came from a single plant or a larger planting block. Single-plant selections and open-pollinated populations behave differently, so record which one you have.
- Collection site: The bed, row, or field where the parent grew, such as "back bed, row 3" or "north trellis."
- Growing conditions: Soil, sun exposure, and any treatments used, plus whether the plant was grown under cover or in the open.
If you saved seed from your own plants, record which plants you chose and why. Choosing healthy, strong parent plants is one of the simplest ways to improve a seed line, and the reason you selected a plant is often more valuable than the plant name alone.
Watch out: Seeds from hybrid plants may not grow true to type. Mark hybrids clearly in your log so you do not expect identical plants next season, and note whether the original seed was labeled hybrid, open-pollinated, or heirloom.
A common pattern among experienced seed savers is to record provenance in layers: the original supplier first, then each generation you grow and save. That way a seed lot carries its full history, and you can tell a first-year save from a line you have maintained for several seasons.
Step 4: How to Label Saved Seeds
A good label makes a seed easy to identify at a glance. Label every jar or envelope before you store it. Our practical guide to labeling seed packets walks through clear, durable label formats you can use right away.
Include these details on each label:
- Variety name
- Collection date
- Batch ID
- Source or parent plant
Use a waterproof marker or printed labels so the writing lasts. Store the labeled seeds in your organizer so each slot matches its log entry.
The WALERICA kit includes labels and clips to help keep every envelope organized and easy to find.
Building a Seed Inventory Template You Can Reuse Each Season
A seed inventory template lets you track every variety from one season to the next. Build it once, then copy it each year so your records stay consistent and comparable.
Sample inventory layout:
| Batch ID | Variety | Collection Date | Source | Quantity | Storage Slot | Notes |
|---|---|---|---|---|---|---|
| 2026-014 | Cherokee Purple tomato | 09/12/2026 | Back bed, row 3 | 40 seeds | 12 | Strong vigor |
| 2026-015 | Kentucky Wonder bean | 10/03/2026 | Trellis, north side | 60 seeds | 27 | Heavy yield |
A minimum data standard for home seed savers. Not every field matters equally. Treat these as essential, and add the rest as optional so records stay complete without becoming a chore.
Essential fields:
- Batch ID
- Variety or crop name
- Collection date
- Source (supplier, donor, or parent plant)
- Storage slot
Optional fields:
- Quantity
- Parent plant notes
- Growing conditions
- Hybrid status
Batch identifiers and combining lots. Give every harvest its own batch ID using a simple pattern, such as year plus a running number (2026-014). If you combine two lots of the same variety, create a new batch ID and note both original IDs in the notes field rather than overwriting either one. That preserves traceability even after lots are merged.
Data accuracy and backups. Pick one date format, such as MM/DD/YYYY, and use it everywhere so sorting works. Before adding a new row, check for a duplicate batch ID. Keep a paper copy of your log and a digital backup, and refresh the backup at the end of each season so records survive across years.
Checklist of essential data points to track:
- Batch ID assigned
- Variety name recorded
- Collection date written
- Source location noted
- Quantity estimated
- Storage slot matched to log
- Notes on plant health added
Save a clean copy of this template each season so your records stay consistent, and store it with your labeled seeds so the log and the jars always match. For more on keeping an organized, reusable garden seed inventory, see the full management guide.
Start Your Seed Harvest Log With the WALERICA Kit This Season
Good records start with good organization. The WALERICA Seed Storage Organizer Kit - 120 Jars gives you 120 individual jars to label and sort by batch, so every harvest has its own place.
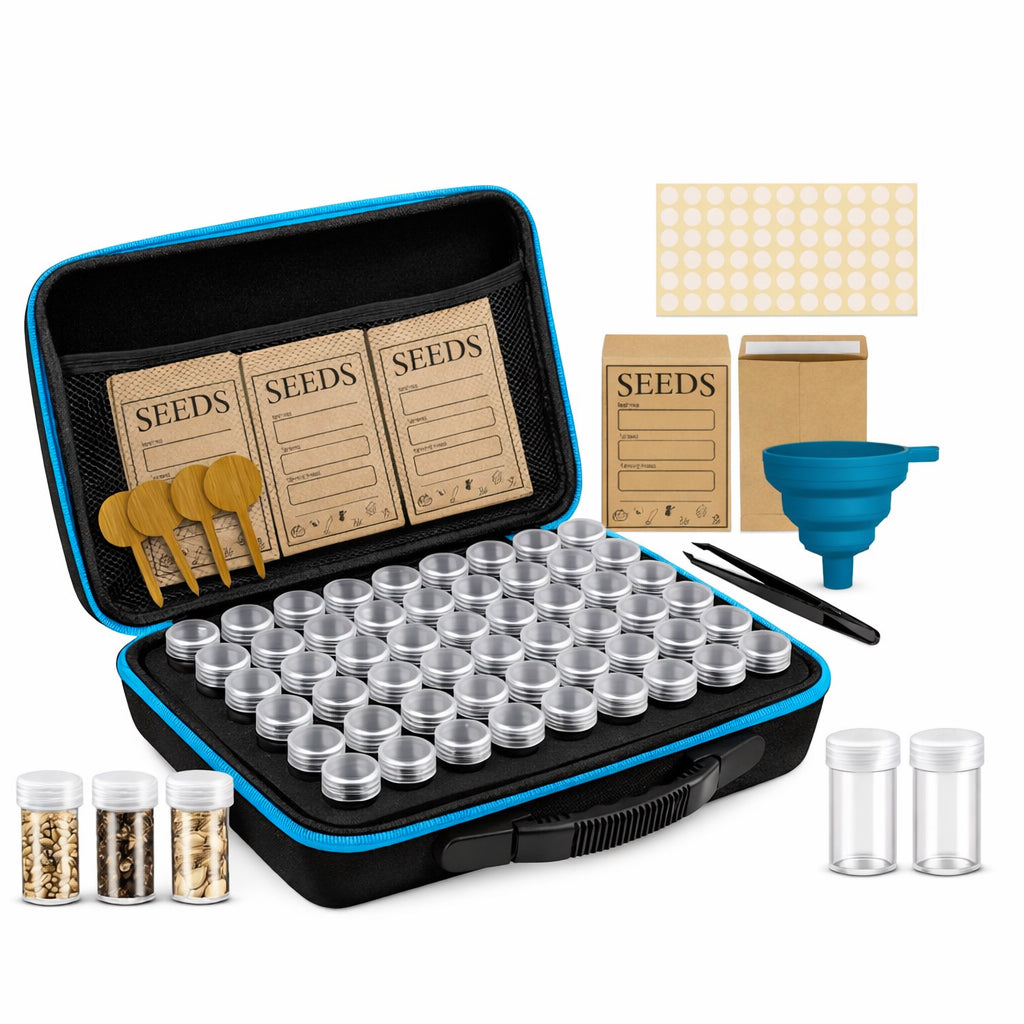
If you want a larger setup with tools included, the WALERICA Triple AAA Premium Seed Storage Organizer Kit - 120 Slots with Tools adds a carrying case, funnel, tweezers, and extra labels for busy seasons.
Start your log this season. Record the date and source at every harvest, and your future planting decisions will be much easier.
Frequently Asked Questions
What should I record when saving seeds?
At minimum, record the plant species and variety, the harvest or collection date, the source location or the plant it came from, and the year. Adding notes on plant health, flavor, or growth habit makes future planting decisions easier. A consistent set of fields across every seed lot keeps your seed storage log useful over multiple seasons, and it lets you compare how a variety performed in different years.
How should I label saved seeds?
Label each container with the variety name, the harvest year, and a short batch or lot identifier that links to your seed storage log. Write on the label with a pencil or a waterproof marker, and keep it inside or on the jar so it does not fade or fall off. Use the same format for every seed lot so you can find entries quickly, and label before you store to avoid mix-ups.
How do I track seed collection dates for different plants?
Create one row per seed lot in your seed storage log and enter the date you collected the seeds as you harvest them. Record the date for each plant or variety separately, even when you collect from several plants on the same day. A seed inventory template with separate columns for collection date and planting date helps you spot patterns in timing over several seasons.
Why should I record seed harvest dates?
Harvest dates show how old a seed lot is, which helps you decide when to plant it and when to replace it. Seed viability declines over time, so a dated record lets you rotate older seeds first. Dates also help you track when each variety matures in your garden, which makes planning future planting schedules more accurate.

