
9 Seed Saving Supplies Every Gardener Needs
Quick Summary
Seed saving supplies cover five stages: collecting, cleaning, drying, storing and labeling. For collecting, gardeners use pollen, blossom and tassel bags, plus paper envelopes. Cleaning calls for screens sized to the seed, while storage works best in sealed glass jars, tins or vials kept cool and dark.
- Gather collecting supplies such as pollen bags and envelopes before harvest season starts.
- Match screen size to seed size, using roughly 1/16 inch mesh for small seeds like lettuce and carrots.
- Keep at least two screen sizes on hand, because one screen for every crop is a common mistake.
- Make sure seeds are fully dry before sealing them, since trapped moisture causes molding.
- Label every envelope and container with the variety name and harvest year.
Table of Contents
- A Complete Seed Saving Supply Checklist by Stage
- Seed Saving Tools for Collecting and Cleaning
- Seed Saving Envelopes and Packets: What Works Best
- Seed Storage Containers: Jars, Tins and Vials Compared
- Budget, Reusable and DIY Alternatives
- Choosing a Seed Saver Kit for Your Garden Size
- Start Organizing Your Seed Collection This Season
- Frequently Asked Questions
9 Seed Saving Supplies Every Gardener Needs
Last Updated: November 18, 2026
A Complete Seed Saving Supply Checklist by Stage
Seed saving breaks into stages: collecting, cleaning, drying, storing and labeling. Each stage calls for different seed saving supplies. Gardeners who gather the right tools before the harvest season starts tend to lose far fewer seeds to mistakes and mixed varieties.
Start with the supplies you need during collecting, then add cleaning tools, storage containers and labeling materials as the season moves along.
Here is a simple checklist to work from:
- Collecting: pollen bags, blossom bags, tassel bags, paper envelopes
- Cleaning: soil sieve, seed-cleaning screens, a corn or popcorn sheller for larger crops
- Drying: drying screens, paper plates, coffee filters, clean newspaper
- Storing: glass jars, storage tins, small vials, moisture-safe containers
- Labeling and records: labels, markers, a seed journal or notebook
The checklist matters most at the start. Gardeners often buy storage containers first and then realize they have no way to keep varieties separate during the harvest. Setting up the collecting supplies early prevents that mix-up.
Seed Saving Tools for Collecting and Cleaning
Collecting and cleaning seeds takes patience more than special equipment, but the right tool depends heavily on the crop. A screen that works for beans will lose a lettuce seed, and a bag that protects a pepper flower is the wrong shape for a corn tassel. Matching tools to seed type is the difference between a clean batch and a handful of chaff.
Soil Sieves, Shellers and Cleaning Screens
A soil sieve or mesh screen removes chaff, dirt and plant debris from seeds after they dry. Screen size should follow seed size:
- Fine screens (around 1/16 inch mesh): carrots, basil, lettuce, and other small seeds that fall through coarser mesh.
- Medium screens (around 1/8 inch): tomatoes, peppers, and brassicas once the pulp or pods are broken up.
- Coarse sieves (1/4 inch and up): beans, peas, and other large seeds that need chaff lifted away without losing the seed.
A corn or popcorn sheller separates kernels from cobs quickly and is worth the space once you save corn every year. For most other crops, a screen and a bowl handle the job. Gardeners who save only a few varieties can often clean seeds with a screen and a bowl; those who save many varieties should keep each cleaned batch in its own labeled container so nothing gets mixed.
Pollen, Blossom and Tassel Bags
Bags protect flowers from unwanted pollinators, which helps keep a variety true to type. Pollen bags cover flowers that are about to open, blossom bags protect fruiting plants, and tassel bags cover corn tassels before they release pollen. The bag material matters too: lightweight spun-bond fabric lets air and light through while blocking insects, which suits most home gardens, while paper bags are cheaper but tear and trap moisture in wet weather.
Bags need to go on before the flower opens.
Supplies by Crop and Seed Type
A practical crop-by-crop guide saves guesswork:
- Tomatoes and peppers: blossom bags to isolate flowers, a fine screen for cleaning, and fermentation jars for tomato seed gel.
- Beans and peas: row cover or isolation distance instead of bags, a coarse sieve for chaff, and paper envelopes for short-term holding.
- Corn: tassel bags and ear bags for controlled pollination, plus a sheller for processing.
- Lettuce and herbs: fine screens, coffee filters for drying small batches, and glassine envelopes for storage.
- Squash and cucurbits: hand-pollination supplies, bags, clips and a small brush, because insect pollination crosses varieties easily.
Watch out: using one screen for every crop is the most common cleaning mistake. Small seeds slip through coarse mesh and large seeds ride on top of fine mesh, so keep at least two screen sizes on hand before harvest season starts.
Seed Saving Envelopes and Packets: What Works Best
Paper envelopes are the most common choice for short-term storage and for sharing seeds with other gardeners. Glassine envelopes resist moisture better than plain paper, which makes them a good option for drying and holding seeds before they go into a longer-term container.
Many gardeners also use small paper seed packets printed with variety names and harvest dates. Packets look tidy, but they offer little protection from humidity, so move them into a sealed container for storage.
| Option | Best For | Moisture Protection | Notes |
|---|---|---|---|
| Paper envelopes | Drying and sharing | Low | Inexpensive and easy to label |
| Glassine envelopes | Short-term storage | Moderate | Resist moisture better than plain paper |
| Printed seed packets | Display and gifts | Low | Best kept inside a sealed container |
Labeling matters as much as the envelope itself. Write the variety name, the harvest year and the date on each envelope before you put seeds inside. Those details help you plan future plantings and avoid losing track of older batches.
Seed Storage Containers: Jars, Tins and Vials Compared
Storage containers protect seeds from the three things that shorten viability most: moisture, heat and light. The container is only half the system. What matters just as much is where the container sits and how dry the seeds are before it closes.
Glass jars with tight lids are easy to inspect and work well for larger batches. Metal tins block light and stack neatly on a shelf. Small vials suit a few varieties or seeds you want to separate in a single box. Resealable mylar bags and vacuum-sealed pouches are another option for longer-term holding, though they are harder to reopen and reseal cleanly once a batch is in use.
Pros and cons vary by container type:
- Glass jars: Easy to see inside and reusable, but heavier and breakable.
- Storage tins: Lightweight and block light, but harder to check at a glance.
- Small vials: Good for organizing many varieties in one place, but hold only small amounts.
- Mylar bags and vacuum pouches: Strong moisture and light barrier for long-term storage, but less convenient for seeds you open often.
Storage Conditions That Determine How Long Seeds Last
A sealed jar does little good in a hot garage. Seeds generally keep longest when they are fully dry, held cool and dark, and kept away from humidity swings. A common pattern is to store containers in a cool closet or basement rather than a shed, and to add a desiccant packet to each container when indoor humidity runs high.
Cooler, drier storage generally extends how long seeds stay viable. You do not need a lab to apply it: keep seeds dry, keep them cool, and keep them dark.
Expected viability varies by crop, so check the storage life of each variety you save. Label each container with the harvest year so you can rotate older stock first.
Watch out: sealing seeds before they are fully dry traps moisture inside the container and is the most common reason a stored batch molds or rots. Test large seeds by bending one, if it snaps instead of flexing, it is dry enough to store.
Matching the Container to the Collection
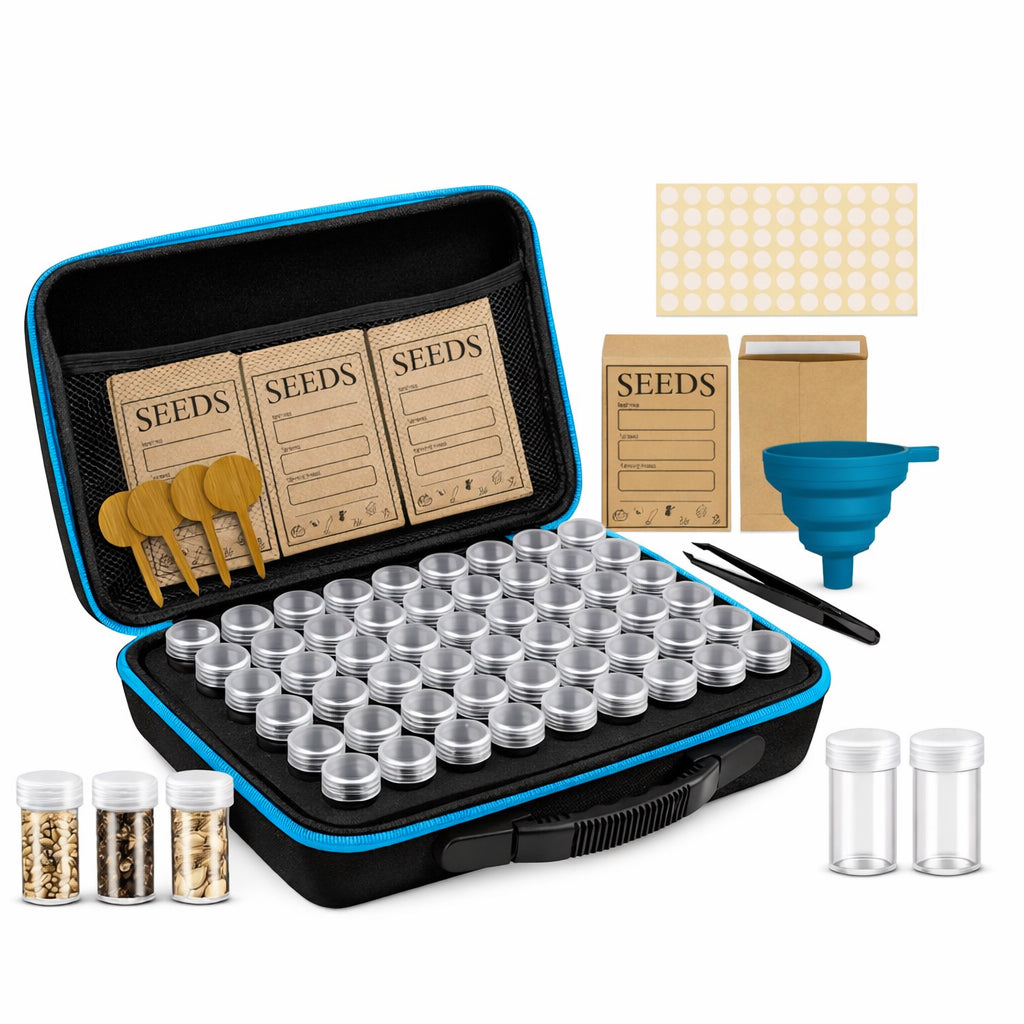
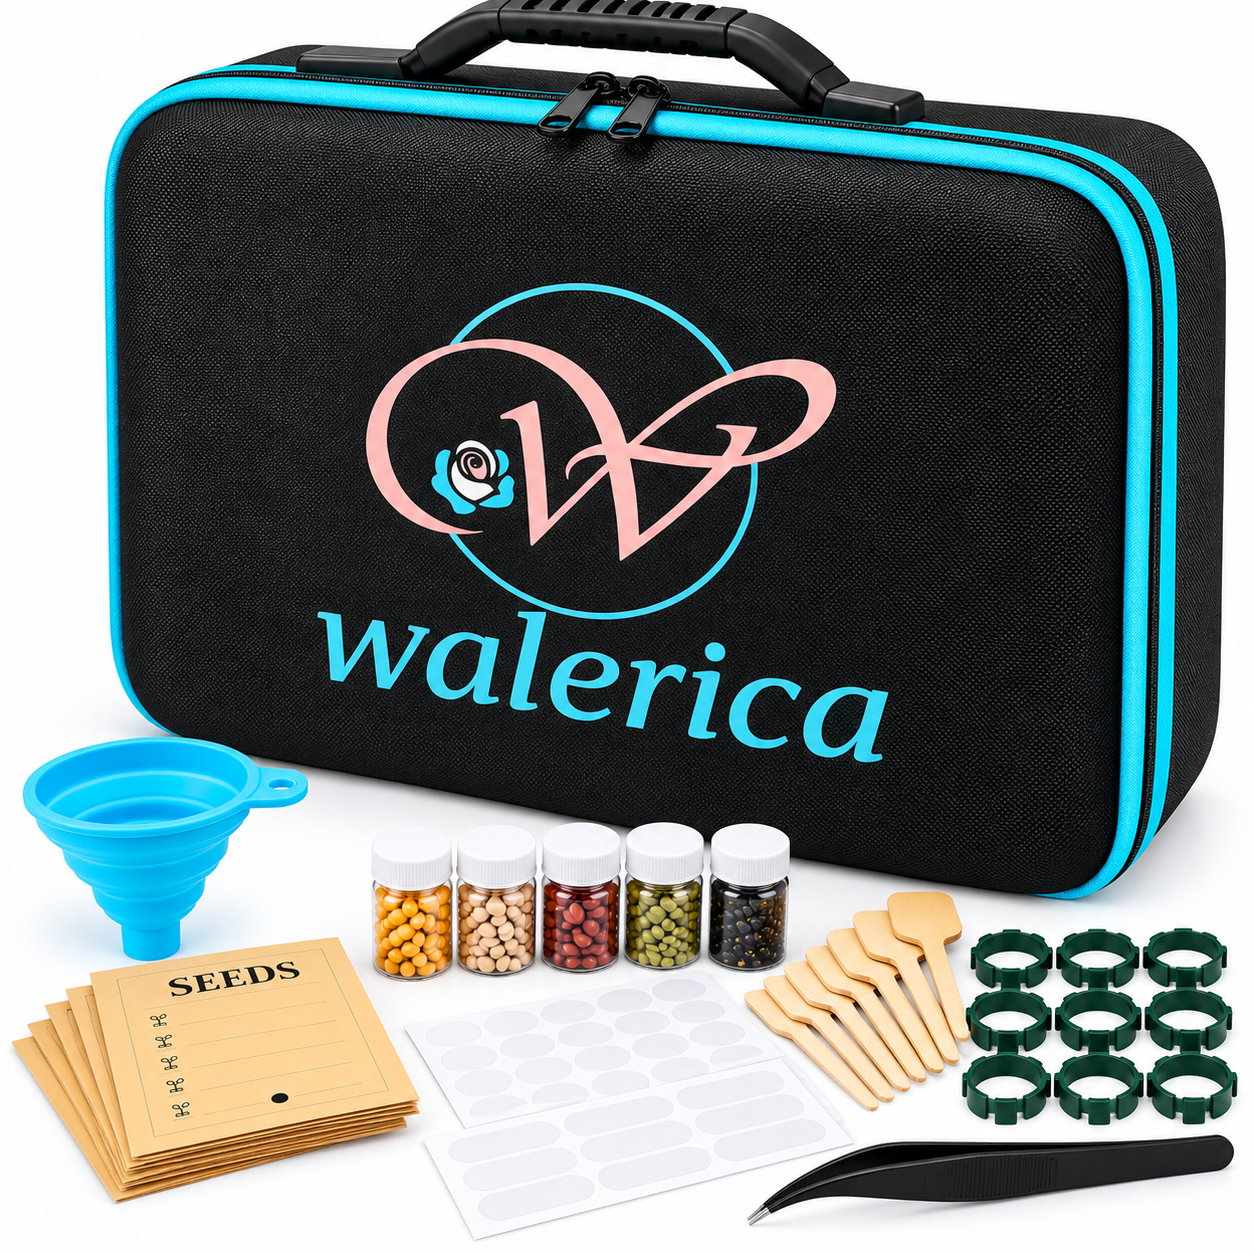
A few varieties fit in a single box of vials or a small tin. Once a collection grows past a shelf, a labeled organizer with one compartment per variety saves time and prevents mix-ups. The WALERICA Seed Storage Organizer Kit - 120 Jars is built around that one-variety-per-jar approach, and the WALERICA Triple AAA Premium Seed Storage Organizer Kit - 120 Slots with Tools adds a carrying case and sorting tools for gardeners who save across many crops. Whichever container you choose, the storage conditions above matter more than the container itself.
Budget, Reusable and DIY Alternatives
Specialty seed-saving supplies are not the only option. Many gardeners rely on items they already own. Paper coffee filters can hold small seed batches. Clean mason jars, empty spice tins and reused pill bottles work as storage containers. Brown paper bags and clean newspaper make inexpensive drying surfaces.
Reusable items cut costs over multiple seasons. Glass jars, metal tins and a sturdy sieve can last for years with basic care. Disposable paper envelopes, by contrast, need replacing each season, so they add up over time.
DIY options work well for beginners who are testing whether seed saving suits them. Once you know which crops you save most often, you can invest in more durable supplies.
Choosing a Seed Saver Kit for Your Garden Size
A complete kit can simplify setup, especially for gardeners who save many varieties. The right kit depends on how many seeds you store each year.
The WALERICA Seed Storage Organizer Kit - 120 Jars suits gardeners who want a single organizer for a large collection, with 120 jars to keep each variety separate. If you want a more complete setup, the WALERICA Triple AAA Premium Seed Storage Organizer Kit - 120 Slots with Tools adds a carrying case and the tools for sorting and labeling.
For a small garden with a few varieties, a basic set of jars and envelopes may be enough. A larger kit makes more sense once your collection grows past what fits on a shelf or in a drawer.
Start Organizing Your Seed Collection This Season
Start with the supplies that protect your current harvest, then build out from there. Collecting bags, labeled envelopes and a sealed container cover the essentials. Once those are in place, add a cleaning tool and a storage system that fits your collection size.
Organizing heirloom seed packets is easier when you follow a clear order. How to Organize Heirloom Seed Packets: Step-by-Step walks through the process once your supplies are ready.
If you are still deciding where to find envelopes, Where to Buy Seed Envelopes for Storing Garden Seeds covers your options. Once your envelopes are in hand, How Should You Label Seed Envelopes Correctly? explains how to label them so your collection stays organized through the season.
Ready to get started? GET YOUR WALERICA KIT and keep this season's seeds labeled, protected and easy to find.
Frequently Asked Questions
What's the best thing to store seeds in?
Airtight glass jars and sealed metal tins are the most common choices for storing dried seeds, because they block moisture and pests. Paper envelopes work well for short-term storage and for labeling, but they do not protect seeds from humidity. Store containers in a cool, dry, dark place such as a closet or drawer. Adding a food-safe silica gel packet inside a jar can help keep humidity low. Check seeds periodically for signs of moisture, such as clumping or mold.
Are seed envelopes or jars better for storing seeds?
Each has a different job. Seed saving envelopes, especially glassine or paper, let seeds breathe during the drying stage and make labeling simple. Jars provide a sealed environment for long-term storage once seeds are fully dry. Many seed savers dry seeds in envelopes first, then move them into jars or tins for storage. Using both gives you clear labeling and better protection over the seasons.
How should you label saved seeds?
Include the plant name, variety, year harvested, and the location or parent plant if you want to track performance. Write labels in pencil or with waterproof ink so they stay readable in humid conditions. Keep a notebook that matches each label to your records. Consistent labeling makes it far easier to find the right seeds at planting time and to avoid mixing similar varieties.
What supplies do you need to save seeds?
At a minimum, you need seed envelopes or paper bags for drying, a labeled storage container such as jars or tins, and a way to clean seeds, like a fine mesh sieve. For crops that cross-pollinate, pollen bags or blossom bags help isolate flowers. A notebook, labels, and a small funnel make collecting and transferring seeds much easier. Start with what your crops require and add tools as your collection grows.

