

Mantener Viabilidad de Semillas a Largo Plazo: Guía 2026
Table of Contents
- Factores que Afectan la Viabilidad de las Semillas a Largo Plazo
- Control de Humedad en el Almacenamiento de Semillas: Métodos Caseros y Profesionales
- Cómo Probar la Viabilidad de las Semillas: Pruebas de Germinación y Vigor
- Tabla de Vida Útil de Semillas: ¿Cuánto Duran Según la Especie?
- Almacenamiento a Corto vs. Largo Plazo: Estrategias para Cada Objetivo
- Errores Comunes al Mantener Viabilidad de Semillas y Cómo Evitarlos
- Conclusión: Asegure su Legado de Cultivo con un Sistema Organizado
- Frequently Asked Questions
Last Updated: September 16, 2026
Factores que Afectan la Viabilidad de las Semillas a Largo Plazo
La viabilidad semillas is the percentage of seeds in a lot that will germinate under favorable conditions; it declines as the embryo consumes stored energy and cell membranes break down. This guide from Moderno Top Shop explains what drives seed longevity and how to slow the clock.
Contenido de Humedad y Humedad Relativa
Internal seed moisture is the strongest predictor of seed longevity: every extra point speeds up the metabolic reactions that degrade the embryo.
Temperatura y Estabilidad Ambiental
Temperature works alongside moisture, and the two compound. Cooler storage slows each seed's metabolic rate, stretching the window before the embryo runs out of usable energy.
Control de Humedad en el Almacenamiento de Semillas: Métodos Caseros y Profesionales
The most effective moisture control combines a desiccant inside a sealed container with a stable, cool location. A desiccant does not dry your seeds; it holds the container's air at a low equilibrium relative humidity so the seeds stop reabsorbing water.
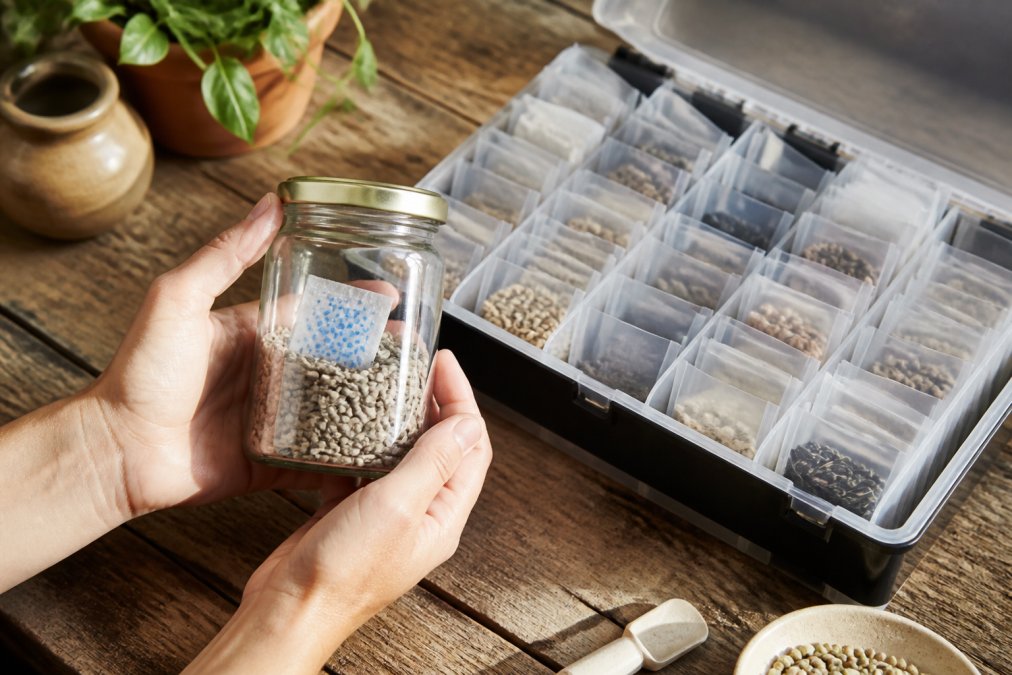
How Desiccants Actually Work
Silica gel is the standard because it pulls the container's internal relative humidity down to roughly 10 to 20 percent and holds it there until it saturates. The indicator type changes color as it loads up, telling you when to recharge it: spread the beads on a baking sheet, warm them in a low oven until the color resets, and let them cool before returning them to the jar.
Low-Cost Desiccant Alternatives
If you do not want to buy silica gel, several household materials work, with trade-offs:
- Dry rice. Cheap but slow and quick to saturate. Use only short-term, and toast it first to drive off existing moisture.
- Powdered milk. A traditional seed-bank trick: pour a layer into the jar, cover with a paper towel or coffee filter, and set the seed packet on top. Works well for small lots.
- Activated charcoal. Better at odor control than moisture control. Use alongside a real desiccant, not instead of one.
- Baked clay or terra cotta. A slow buffer, not a strong desiccant. Pair it with silica gel for long-term storage.
Sealed Containers: The Other Half of the Equation
Glass jars with rubber gaskets, vacuum-sealed bags, and airtight plastic containers all work. The container's job is to block outside humidity, not create a perfect vacuum, and the seal must hold over months and years. A jar that passes the squeeze test today may lose its gasket by next season, so check seals before each storage cycle.
What Professional Seed Banks Do Differently
Professional operations control humidity and temperature in dedicated chambers and dry seeds to a precise moisture content before sealing. The home version costs little: dry thoroughly, seal with enough desiccant to hold humidity low, and store somewhere cool and stable. You do not need a walk-in chamber, only the discipline to dry, seal, and hold steady.
Cómo Probar la Viabilidad de las Semillas: Pruebas de Germinación y Vigor
The only reliable way to know your viabilidad semillas is to test them, and germination testing is simple enough for a kitchen counter. Viability tells you what percentage will sprout; vigor tells you how strong those sprouts will be.
Here is the standard home germination test:
- Count out 10 seeds from the lot you want to test.
- Place them on a damp paper towel, spacing them apart.
- Fold the towel and slide it into a sealed plastic bag.
- Keep the bag in a warm spot, around 70 to 75 degrees Fahrenheit.
- Check daily and keep the towel moist, not soaking.
- Count how many seeds sprout within 7 to 14 days, depending on species.
- Multiply the number of sprouts by 10 to get your germination percentage.
Tabla de Vida Útil de Semillas: ¿Cuánto Duran Según la Especie?
Seed shelf life varies enormously by species. The chart below gives general expectations for properly dried and stored seeds; treat them as guidelines, since your storage conditions shift them up or down.
| Seed Type | Typical Shelf Life | Storage Notes |
|---|---|---|
| Onion, parsnip, leek | 1-2 years | Short-lived; test before each season |
| Corn, pepper, carrot | 2-3 years | Sensitive to moisture |
| Bean, pea, tomato | 3-5 years | Reliable with dry, cool storage |
| Cucumber, lettuce, beet | 4-6 years | Tolerates longer storage well |
| Squash, melon, radish | 5-6 years | Sturdy; keeps well when sealed |
| Sunflower, spinach | 2-3 years | Oily seeds turn rancid faster |
Almacenamiento a Corto vs. Largo Plazo: Estrategias para Cada Objetivo
Short-term and long-term storage call for different setups, so match the method to how long you need the seed to last. The gap most guides leave open is what to do when you are not sure a seed is still good, and how to tell without waiting two weeks for a germination test.
Short-Term Storage: One to Two Seasons
For seed you will plant within a year or two, a cool dark shelf or a refrigerator door works fine. Keep seeds in sealed containers with a desiccant and out of heat and humidity; no freezing or elaborate humidity control needed.
Walerica Seed Organizer Kit – 120 Slots →
Long-Term Storage: Three Years or More
Long-term storage requires more discipline: dry the seeds thoroughly, seal them with a desiccant, and hold them at a stable cold temperature. Labeling becomes critical here, because a seed you cannot identify is one you will not trust to plant. An organized, labeled system means you always know what you have, how old it is, and when it was last tested.
Reading the Signs: Visual Cues of Deterioration
You do not always have to wait for a germination test to know a lot is fading. Seeds give off signals before they die, and reading them saves a season of disappointment.
- Discoloration. Healthy seeds hold a consistent color; faded, grayish, or mottled seeds are often on the way out.
- Wrinkling or shriveling. A collapsed or cracked seed coat usually means the embryo has lost moisture and structure.
- Mold or musty smell. Fuzz, dark spots, or a sour odor means the lot was stored too wet and is likely compromised. Discard it rather than plant it.
- Brittleness. A seed that snaps instead of flexing has been over-dried or lost internal structure, common in oily seeds like sunflower and squash.
- Insect damage. Small holes, fine dust, or live insects mean infestation. Freeze the lot briefly to kill pests before deciding whether to keep it, and inspect the rest of your collection.
A Simple Decision Framework
When you pull a lot out of storage, run through this in order:
- Check the label. Knowing the species and year saved tells you roughly what to expect from the shelf-life chart.
- Look at the seeds. Any mold, brittleness, or discoloration means test before you trust it.
- Test a sample. Ten to 25 seeds on a damp paper towel gives the germination rate within two weeks.
- Decide. Above 80 percent, plant normally. Between 50 and 80 percent, sow more thickly. Below 50 percent, replace the lot or use it only for a cover crop.
Errores Comunes al Mantener Viabilidad de Semillas y Cómo Evitarlos
Most seed collections fail for the same handful of preventable reasons. Here are the mistakes that cost gardeners the most, and how to sidestep each.
- Storing seeds in paper envelopes in a humid room. Paper breathes, so seeds equilibrate to room humidity within weeks. Move them into sealed containers with a desiccant.
- Freezing seeds that are not fully dry. Ice crystals rupture the embryo and kill the seed. Dry first, seal second, freeze last.
- Skipping the label. An unlabeled seed is one you will not plant with confidence. Label every lot with species and year saved.
- Letting temperature swing. Condensation from temperature cycles kills more seeds than steady warmth does. Pick one stable, cool spot and leave them there.
- Never testing. Viability drops silently. A quick germination test each season tells you which lots to sow thickly and which to replace.
- Mixing old and new seed. Keep lots separate to track age and test results; blending hides which seeds are failing.
Conclusión: Asegure su Legado de Cultivo con un Sistema Organizado
Keeping seeds viable for the long haul comes down to three things you control completely: keep them dry, keep them cool, and keep them organized. Moisture and heat are the enemies; labels and sealed containers are the defense. Test your lots each season, replace what has faded, and your collection will outlast any single growing year.
Frequently Asked Questions
¿Cómo conservar semillas por muchos años?
Para conservar semillas durante años, reduzca su contenido de humedad a menos del 8% y guárdelas en un recipiente hermético en un lugar fresco y oscuro. La temperatura ideal está entre 32°F y 50°F (0°C a 10°C). Evite fluctuaciones de temperatura y humedad. Un organizador como el WALERICA Seed Storage Organizer Kit, con 120 viales individuales, ayuda a mantener cada variedad sellada y etiquetada, protegiéndolas de la humedad y el deterioro.
¿Qué significa la viabilidad en las semillas?
La viabilidad de las semillas es su capacidad para germinar y producir una plántula saludable bajo condiciones adecuadas. Una semilla viable tiene un embrión vivo y reservas de energía suficientes. La viabilidad disminuye con el tiempo según la especie, las condiciones de almacenamiento y el manejo. Las pruebas de germinación caseras, como colocar semillas en una toalla húmeda, permiten estimar qué porcentaje de su lote aún puede germinar.
¿Cuánto tiempo puede durar una semilla guardada?
La longevidad varía por especie. Las semillas de cebolla, puerro y perejil duran 1-2 años; las de zanahoria, lechuga y espinaca, 3-5 años; las de tomate, pepino y rábano, 4-5 años; y las de frijol, maíz y calabaza, 5-6 años. Almacenadas correctamente en condiciones frías y secas, muchas semillas superan estos promedios. Consulte una tabla de vida útil para planificar sus siembras.
¿Cuáles son las formas de conservar las semillas?
Los métodos incluyen almacenamiento en frascos herméticos con desecante, sellado al vacío, refrigeración y congelación para semillas ortodoxas. El control de la humedad es clave: use gel de sílice o leche en polvo como desecante casero. Mantenga temperaturas estables y oscuridad. Para colecciones grandes, un organizador con viales individuales facilita el etiquetado y la rotación, evitando mezclas y pérdidas.
What are the primary factors that affect seed viability over time?
The main factors are seed moisture content, storage temperature, relative humidity, oxygen exposure, and physical damage. High moisture and warm temperatures accelerate metabolic activity and fungal growth, reducing shelf life. Seeds stored with low moisture (below 8%) and at cold, stable temperatures (32°F to 50°F) maintain viability longest. Seed type also matters: orthodox seeds tolerate drying and cold, while recalcitrant seeds do not.
How can I tell if my stored seeds are still viable?
Perform a simple germination test: place 10 seeds on a moist paper towel, seal in a plastic bag, and keep at room temperature for 7-14 days. Count how many sprout. If fewer than 50% germinate, your seeds may still be usable but sow them thicker. You can also inspect for visual signs of deterioration: cracks, mold, discoloration, or a musty smell indicate poor storage and reduced viability.
What is the ideal temperature and humidity for long-term seed storage?
The ideal conditions are a temperature between 32°F and 50°F (0°C to 10°C) and relative humidity below 50%, with seed moisture content between 5% and 8%. A refrigerator works well for most home gardeners. Avoid freezers unless seeds are properly dried and sealed, as ice crystals can damage embryos. Stability matters as much as the exact numbers: fluctuating conditions speed up deterioration.
How does the WALERICA Seed Storage Organizer help maintain seed health?
The WALERICA kit provides 120 individual vials, each sealable to protect seeds from moisture and physical damage. Its water-resistant design and included labels, clips, and tools make it easy to organize, identify, and access varieties. By keeping seeds separate and labeled, you reduce the risk of mixing and can monitor each batch's viability. The portable case keeps your collection ready for planting season.
