
Semillas de Huerto: Your 2026 Guide to Planting and Storage
Table of Contents
- Choosing the Right Semillas de Huerto for Your Garden
- How to Store Garden Seeds Long Term
- The Best Seed Storage Organizer for Gardeners
- Seed Starting Calendar for Beginners
- Step-by-Step Planting Instructions for Semillas de Huerto
- Troubleshooting Common Germination Problems
- Frequently Asked Questions
Last Updated: September 25, 2026
Choosing the Right Semillas de Huerto for Your Garden
The right semillas de huerto start with one decision: open-pollinated or hybrid? That single choice affects everything from flavor to whether you can save seeds next year.
Heirloom seeds are open-pollinated varieties passed down through generations, typically at least 50 years old. They breed true, meaning saved seeds produce plants like the parent. Hybrid seeds result from deliberate cross-breeding of two parent lines for specific traits like disease resistance or uniform ripening.
Here's the trade-off most catalog descriptions skip: heirlooms deliver flavor and seed-saving freedom, but hybrids often outperform them on vigor and consistency. If you plan to save and store seeds long term, heirlooms are the practical choice. If you want maximum yield this season and don't care about replanting, hybrids earn their place.
University extension guidance on heirloom versus hybrid seeds
How to Store Garden Seeds Long Term
Learning how to store garden seeds long term comes down to three enemies: moisture, heat, and light. Defeat all three and many vegetable seeds stay viable for years beyond their packet date. Most seed packets list a vague "plant by" year, but the real variable is how you store them, the same tomato seed can last two seasons on a shelf or eight years in a sealed jar in the refrigerator.
The storage formula is simple. Seeds keep best when relative humidity stays low, temperatures stay cool and stable, and light stays out entirely. A dark closet beats a sunny windowsill every time. For longer horizons, refrigerated storage extends viability further, provided seeds sit in an airtight container.
Moisture and Temperature Control
Moisture is the silent killer of seed collections. Even brief exposure to humid air can trigger premature germination or mold. Silica gel packets tucked into storage containers absorb stray moisture before it reaches your seeds. A practical ratio is one fresh silica packet per small jar or per every 20 to 30 seed envelopes in a larger container; swap the packets out once a season, since they saturate.
Temperature matters just as much. Fluctuating temperatures stress seeds more than steady cool conditions. Pick one spot, keep it consistent, and resist the urge to relocate containers every few weeks. Label each batch with its harvest or purchase date so you know exactly what you're working with.
Viability Timelines by Crop
Not all seeds age at the same rate. Under cool, dry, dark conditions, a common pattern is:
| Crop | Typical Storage Life |
|---|---|
| Beans, peas | 3-4 years |
| Corn, squash | 4-6 years |
| Tomatoes, peppers | 4-6 years |
| Lettuce, spinach | 3-5 years |
| Onion, parsley | 1-2 years |
| Radish, turnip | 4-5 years |
Onion and parsley are the notorious short-lived ones, plan to replant those every year or two rather than relying on a stash.
Container Choices That Actually Work
Glass mason jars with a gasket lid outperform plastic bags and cardboard envelopes because they hold a seal. Mylar bags with a heat seal work for bulk storage. Paper envelopes are fine for a single season but let humidity in over time. Whatever you choose, keep the container opaque or store it inside a dark box, clear jars on an open shelf defeat the purpose.
Test Before You Trust
Before committing garden space to an old packet, run a germination test. Place ten seeds on a damp paper towel, fold it, seal it in a plastic bag, and keep it warm. Count sprouts after 7 to 14 days depending on the crop. Ten out of ten means full speed ahead; five out of ten means sow twice as thick; two or fewer means compost the packet and buy fresh.
That's where organized storage pays off. When every variety is labeled and dated, you know instantly which packets need testing and which are ready to sow.
The Best Seed Storage Organizer for Gardeners
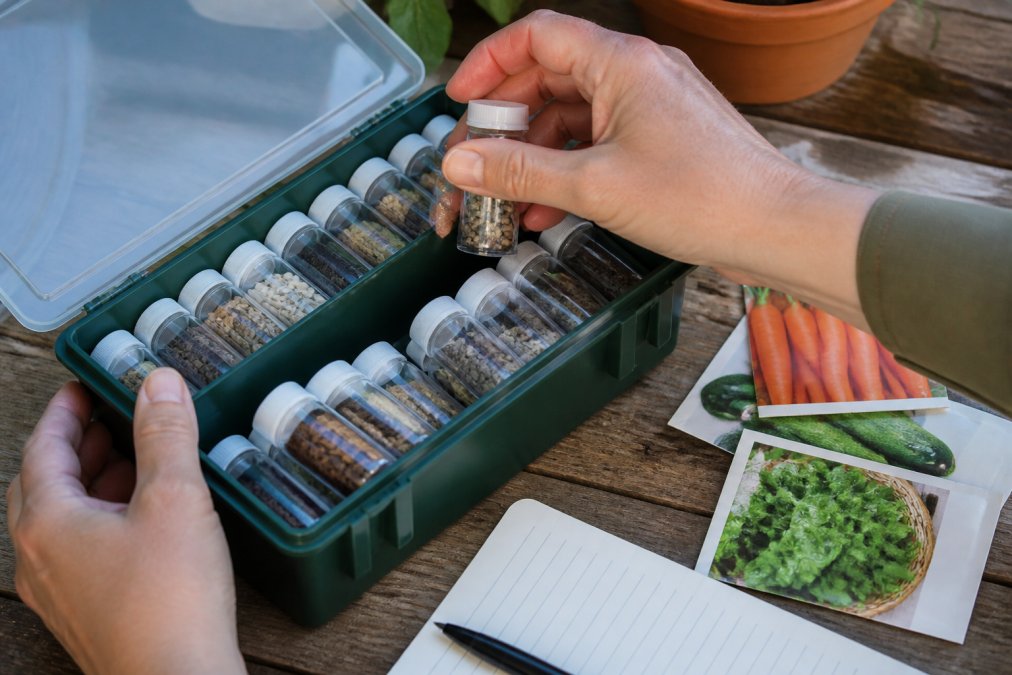
A dedicated seed storage organizer for gardeners solves the problem loose envelopes and plastic bags never will: finding the right variety when planting day arrives. The WALERICA Seed Storage Organizer Kit from Moderno Top Shop holds up to 120 individual vials, each ready for labeling.

Seed Starting Calendar for Beginners
A seed starting calendar for beginners works backward from your last frost date, not forward from January. Get that anchor wrong and even healthy seedlings struggle.
| Crop Type | Start Indoors | Transplant or Direct Sow | Notes |
|---|---|---|---|
| Tomatoes, peppers | 6-8 weeks before last frost | After last frost | Warm soil essential |
| Lettuce, spinach | 4-6 weeks before last frost | 2-3 weeks before last frost | Tolerates cool soil |
| Beans, radishes | Not recommended | Direct sow after last frost | Dislikes transplanting |
| Herbs (basil, cilantro) | 4-6 weeks before last frost | After last frost | Basil needs warmth |
Step-by-Step Planting Instructions for Semillas de Huerto
Follow these planting instructions for semillas de huerto and you'll avoid the mistakes that sink most first attempts. Depth and moisture decide everything, but so does what you plant into. Most guides skip the substrate question entirely, and that's the single biggest variable in germination success.
Pick the Right Starting Mix
Garden soil is the wrong answer indoors: it compacts, drains poorly in small cells, and carries weed seeds and damping-off pathogens. Seed-starting mix is the standard, and it comes in three practical forms:
- Peat-based mix, the traditional choice. Holds moisture well, but dries unevenly and is hard to rewet once it goes bone dry. Watch the surface daily.
- Coir-based mix (coconut fiber), drains faster and rewets more easily than peat. Coir needs slightly more frequent watering but resists the "hydrophobic crust" problem peat develops.
- Vermiculite or perlite blends, often mixed into either base at roughly 1 part to 3 to improve drainage and aeration. Straight vermiculite works well for very fine seeds that need light to germinate.
The Steps
- Fill containers with a light seed-starting mix, not garden soil. Moisten it before sowing, damp like a wrung-out sponge, not dripping.
- Sow at the right depth: roughly two to three times the seed's diameter. Fine seeds like lettuce and basil go on the surface with a dusting of vermiculite; large seeds like beans and squash go an inch deep.
- Water gently until the mix is moist but not soaked. Bottom-watering from a tray avoids displacing tiny seeds.
- Label every container with variety and date. Permanent marker on a plastic tag beats tape every time.
- Keep soil warm and consistently moist until germination. A heat mat set to roughly 70-75°F speeds up tomatoes and peppers; cool-season crops germinate fine at room temperature.
- Provide light immediately after sprouts appear. A south-facing window works, but leggy seedlings are the tell that they need a shop light or LED grow light within a few inches of the tops.
- Thin or transplant once true leaves develop, the second set, not the first pair of seed leaves.
Why This Order Matters
Each step removes a specific failure mode. Pre-moistening prevents the crust that forms when you water dry mix from the top. Bottom-watering prevents seeds from washing into a corner of the cell. Immediate light prevents the stretch that makes seedlings snap at transplant. Skip any one and you'll see the symptom three weeks later, usually as a tray of spindly, pale stems.
Troubleshooting Common Germination Problems
When seeds fail to sprout, the cause is almost always one of four things: temperature, moisture, depth, or age. Work through them in that order before blaming the seed itself.
Frequently Asked Questions
How should I store my garden seeds to keep them viable?
Store your semillas de huerto in a cool, dark, and dry place. Moisture and heat are the main enemies of seed viability. Use airtight containers or a seed storage organizer with individual vials to protect them from humidity. Label each container with the variety name and date. A dedicated seed storage organizer for gardeners keeps everything accessible and protected, so you can find what you need quickly when planting season arrives.
What is the difference between heirloom and hybrid seeds?
Heirloom seeds come from open-pollinated varieties passed down through generations, so you can save seeds and get similar plants next year. Hybrid seeds are created by crossing two specific parent plants for traits like disease resistance or higher yield. Hybrid seeds are often more expensive and you cannot save their seeds reliably. For beginners, heirloom varieties are a good choice if you want to build a self-sustaining seed collection.
When is the best time to start seeds for a home garden?
The best time depends on your last frost date and the specific crop. Cool-season vegetables like lettuce and broccoli can start 6-8 weeks before the last frost indoors. Warm-season crops like tomatoes and peppers need 6-8 weeks before the last frost as well, but they should not go outside until the soil is warm. Create a seed starting calendar for beginners that lists each variety and its ideal start date.
How do I organize a large collection of vegetable seeds?
Use a seed storage organizer with individual compartments or vials. The WALERICA Seed Storage Organizer Kit holds up to 120 varieties and includes labels, clips, and tweezers. Sort seeds by type (vegetables, herbs, flowers) or by planting season. Label each vial with the variety name and year. This system prevents mix-ups and makes it easy to check what you have before buying more. It also protects seeds from moisture and pests.
Seed viability fades quietly, and a disorganized collection makes every planting season a gamble. Moderno Top Shop offers the WALERICA Seed Storage Organizer Kit, which holds up to 120 labeled vials, includes labels, clips, tweezers, a funnel, and essential tools, and protects seeds from moisture and damage with a portable, water-resistant design. Get your WALERICA kit and walk into every planting season knowing exactly what you have.
