
How to Store Vegetable Seeds Fresh: Complete Guide
Table of Contents
- Why Proper Seed Storage Matters
- How to Dry Vegetable Seeds Before Storage
- Choosing the Right Seed Storage Containers
- Creating Ideal Storage Conditions for Fresh Seeds
- Using Desiccants and Moisture Absorbers
- Testing Seed Viability and Detecting Deterioration
- Labeling and Organizing Your Seed Collection
- Frequently Asked Questions
Last Updated: September 24, 2026
Why Proper Seed Storage Matters
Learning how to store vegetable seeds correctly is the difference between a thriving garden and wasted effort. Seeds are living organisms. They need the right conditions to stay viable for years.
Most gardeners grab whatever container is nearby. They toss seeds in a drawer and hope for the best. Then planting season arrives, germination rates plummet, and they wonder why nothing grows.
The problem isn't the seeds. It's how they're stored. Temperature swings, humidity, and light exposure kill seed viability faster than almost anything else. A few simple steps protect your entire collection.
When you store vegetable seeds properly, you unlock benefits that compound over time. You save money by reusing seeds year after year. You build a reliable backup for your favorite varieties. You gain the confidence to experiment with heirloom and specialty seeds. Organizations like the USDA's [seed storage(/products/walerica-seed-storage-kit-new-premium-organizer-120-vials) guidelines | usda.gov] confirm that controlled conditions can extend seed life dramatically.
At Moderno Top Shop, we've seen gardeners transform chaotic seed collections into organized systems that actually work. The right setup takes minimal effort but delivers maximum results.
How to Dry Vegetable Seeds Before Storage
Drying is the critical first step. Wet or moist seeds will rot in storage. Proper drying removes excess moisture without damaging the seed.
Harvesting at the Right Time
Timing matters more than most gardeners realize. Pick seeds when the seed pod or fruit is fully mature but before it drops naturally to the ground.
For tomatoes and peppers, wait until the fruit is ripe and slightly soft. Cut it open and scoop out the seeds with pulp still attached. For beans and peas, leave pods on the plant until they turn brown and papery. The seeds inside should rattle when you shake them.
Harvest on a dry day. Wet seeds from morning dew or rain are harder to dry properly. Collect seeds in a clean container and bring them indoors immediately.
Cleaning and Removing Debris
Seeds often come with pulp, chaff, or other plant material. Remove as much as possible before drying.
For wet seeds with pulp (tomatoes, squash, melons):
- Place seeds in a fine mesh strainer
- Rinse under cool running water
- Rub gently with your fingers to separate pulp
- Drain thoroughly on paper towels
For dry seeds with chaff (beans, peas, lettuce):
- Spread seeds on a flat surface
- Gently blow away light debris
- Pick out any remaining plant material by hand
- A simple fan works well for larger batches
Clean seeds dry faster and store better. Debris traps moisture and invites mold growth.
Air-Drying Process
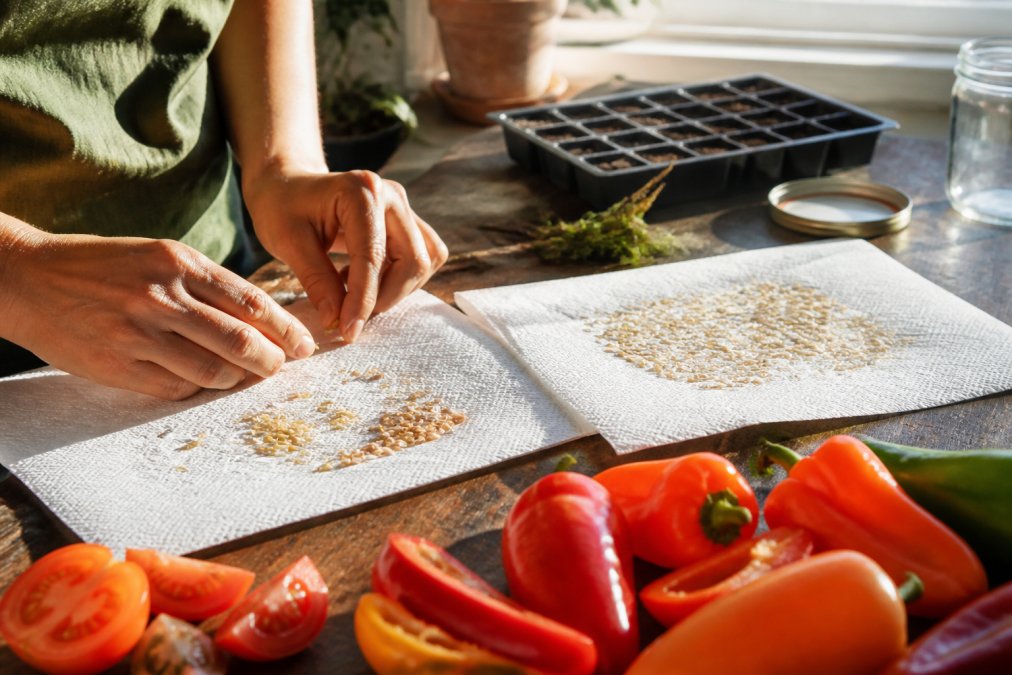
Spread cleaned seeds on paper towels, coffee filters, or newspaper in a single layer. Don't pile them up. Air needs to reach all sides.
Place them in a warm, dry, well-ventilated space indoors. A shelf away from direct sunlight works perfectly. Room temperature between 65-75°F is ideal.
Leave seeds undisturbed for 7-14 days depending on seed size and type. Smaller seeds like lettuce dry faster. Larger seeds like squash take longer. Seeds are ready when they snap cleanly in half rather than bend.
Check daily for mold or unusual odors. If you spot any, spread seeds thinner and increase air circulation. Never use heat sources like ovens or dehydrators, they damage seed viability.
Choosing the Right Seed Storage Containers
The container protects seeds from their three main enemies: light, moisture, and temperature fluctuations. Different containers offer different levels of protection.
Glass Jars and Airtight Vials
Glass is the gold standard for seed storage. It's impermeable to moisture and protects seeds from light when opaque.
Use small glass jars with tight-sealing lids. Mason jars work well for larger collections. Glass vials with rubber seals are ideal for individual seed varieties. They take up minimal space and keep seeds completely isolated.
The advantage: you can see what's inside without opening the container. The disadvantage: clear glass allows light through unless you store jars in a dark cabinet.
Airtight vials eliminate light exposure entirely. They're perfect for long-term storage of rare or heirloom varieties you want to preserve for years.
Paper Envelopes and Labeled Packets
Paper envelopes offer simplicity and organization. They're lightweight, stackable, and take up almost no space.
The trade-off is protection. Paper breathes, so it doesn't seal out moisture as effectively as glass or plastic. Paper works best in dry climates or for short-term storage (one season).
Use high-quality seed packets or glassine envelopes (the waxy paper kind). Avoid regular paper envelopes that absorb moisture. Label clearly with seed variety, harvest date, and source.
For serious long-term storage, paper alone isn't enough. Combine paper packets with a sealed container, place labeled envelopes inside a glass jar or airtight box.
The WALERICA Seed Storage Organizer Kit from Moderno Top Shop includes both vials and labeled packets, giving you flexibility to match your storage method to each seed type. It holds up to 120 varieties and keeps everything organized and protected.
WALERICA Seed Storage Organizer Kit →
Creating Ideal Storage Conditions for Fresh Seeds
Container choice matters, but environment matters more. Store seeds in conditions that minimize stress and slow aging.
Temperature Control
Consistent temperature is critical. Fluctuations cause seeds to absorb and release moisture repeatedly. This shortens viability dramatically.
Store seeds at 40°F or below for long-term storage. A refrigerator or freezer is ideal. Many gardeners dedicate a small shelf in the fridge to seeds. It's consistent, cold, and convenient.
If refrigeration isn't possible, find the coolest, most stable place in your home. A basement or root cellar works. An unheated closet is better than a kitchen cabinet above the stove.
Never store seeds near heat sources. Avoid windowsills, attics, or anywhere temperature swings wildly between seasons.
Managing Humidity Levels
Seeds absorb moisture from the air. High humidity reduces viability quickly. Relative humidity below 50% is target. Below 30% is ideal for long-term storage.
In humid climates, this is the hardest challenge. Desiccants solve it. These are materials that absorb moisture from the air around seeds.
Silica gel is the most effective commercial desiccant. Place a small packet inside your seed container. Replace it annually or when it becomes saturated. Silica gel packets often come with color-changing indicators, they shift from blue to pink when saturated.
For a homemade solution, many gardeners use uncooked rice. Place a small amount in a breathable pouch (cheesecloth works) and tuck it in your seed jar. The rice absorbs moisture slowly but effectively. Replace it every 6 months.
Other budget-friendly options include dry beans or powdered milk in a sealed capsule. The key is using something that absorbs moisture without adding any risk to seeds.
Protecting from Light
Seeds don't need light to stay viable. In fact, light exposure can trigger germination or damage seeds during storage.
Store seeds in opaque containers.
Using Desiccants and Moisture Absorbers
Humidity is the silent killer of seed viability. In most climates, controlling moisture is more important than controlling temperature.
Silica Gel and Commercial Desiccants
Silica gel is the most reliable option. It absorbs up to 40% of its weight in moisture without degrading seeds.
Homemade Moisture Absorption Solutions
Budget-conscious gardeners can skip commercial products. Homemade desiccants work surprisingly well.
Testing Seed Viability and Detecting Deterioration
Before planting, test seeds to confirm they'll germinate. This prevents wasted effort on dead seeds.
Germination Tests
The simplest test is the paper towel method. Place 10 seeds on a damp paper towel. Roll it loosely and place in a plastic bag. Keep it warm (70°F) and moist for 7-10 days.
Signs of Seed Damage and Mold
Inspect seeds regularly. Visible problems mean storage conditions failed.
Mold appears as fuzzy growth or discoloration on seed surfaces. It thrives in moisture. If you spot mold, those seeds are compromised. Remove them immediately and increase desiccant use in that container.
Labeling and Organizing Your Seed Collection
Organization saves time and frustration. When you can find what you need quickly, you use your seeds more effectively.
What Information to Record
Create a simple label for each seed packet or container. Include:
- Seed variety (specific cultivar name, not just "tomato")
- Harvest date or purchase year
- Source (where you got the seeds)
- Expected germination rate if known
- Any special notes (days to maturity, disease resistance, flavor notes)
Organizing by Seed Type and Variety
Group seeds logically. Most gardeners organize by plant type: tomatoes together, peppers together, herbs together, etc.
Frequently Asked Questions
How long can vegetable seeds remain viable in storage?
Most vegetable seeds stay viable for 2-5 years when stored in cool, dry conditions. Proper storage with low humidity, consistent temperatures between 32-41°F, and protection from light can extend viability significantly. Some seeds, like onion and parsnip, decline faster (1-2 years), while others like cabbage and lettuce remain viable for 4-5 years. Testing germination rates annually helps confirm viability before planting season.
Do seeds need to be completely dry before being stored?
Yes, seeds must be thoroughly dry before storage to prevent mold and fungal growth. Moisture triggers germination and promotes decay. Air-dry seeds for 2-3 weeks in a warm, well-ventilated space until they're brittle and snap easily. You can test dryness by attempting to bend a seed, if it breaks cleanly, it's ready for storage. Using desiccants like silica gel further reduces moisture content in your seed storage containers.
What's the best way to organize a large seed collection?
Organize seeds by plant type (vegetables, herbs, flowers) or by planting season for quick access. Label each container with the seed variety, harvest date, and expected germination rate. The WALERICA Seed Storage Organizer holds up to 120 varieties with individual vials, labels, and clips, making it ideal for serious gardeners. Store your organized collection in a cool, dark location like a basement or refrigerator to maximize seed longevity.
How does humidity affect seed germination rates?
High humidity triggers premature germination and causes mold, fungal infections, and seed rot. Ideal relative humidity for seed storage is below 50%, with 20-30% being optimal. Excess moisture speeds up the aging process and reduces viability. Using moisture absorbers like silica gel or homemade solutions (rice or salt in cloth bags) keeps humidity low. Store seeds in airtight containers in a dry environment to maintain consistent, low moisture levels.
