

Organize Seeds with Envelopes and Labels: 2026 Guide
Table of Contents
- Why Organizing Seeds with Envelopes and Labels Matters
- What You'll Need to Get Started
- Step 1: Test Seed Viability Before You Organize
- Step 2: Choose the Best Seed Storage Containers
- Step 3: Build a Seed Packet Labeling System
- Step 4: How to Store Vegetable Seeds by Category and Season
- Step 5: Protect Your Seeds from Moisture and Pests
- Step 6: Sustainable and Recycled Storage Materials
- Frequently Asked Questions
Last Updated: September 15, 2026
Why Organizing Seeds with Envelopes and Labels Matters
A seed collection without a labeling system is a collection you will eventually throw away. When you organize seeds with envelopes and labels, you preserve germination rates, avoid duplicate purchases, and know exactly what to plant each season. Gardeners who store seeds in a shoebox often lose track of varieties within one season.
Here's what most guides get wrong: they treat organization as a storage problem. It's actually a viability problem. A seed kept in a humid drawer loses vigor long before its printed expiration date. The USDA's guidance on [seed storage(/en/collections/seed-storage) and germination | usda.gov] notes that proper storage conditions directly affect how long seeds remain viable. Get the labeling right and the storage right, and a single packet can serve you for three or four seasons.
What You'll Need to Get Started
Gather your supplies before you touch a single seed packet. The right materials cost very little and prevent the two biggest storage failures: moisture and misidentification.
Essential Supplies for Seed Storage
- Paper envelopes or glassine packets for individual varieties
- Permanent fine-tip markers or adhesive labels
- Airtight storage containers with secure seals
- Silica gel desiccant packets
- A notebook or spreadsheet for your inventory
Optional Tools That Make a Difference
A compartment organizer keeps small envelopes from scattering. A humidity gauge tells you whether your storage area is actually dry. And a simple printable template lets you fold uniform envelopes from any paper you already own.
Step 1: Test Seed Viability Before You Organize
Test germination before you invest storage space in old seeds. A simple viability check saves you from labeling and storing seeds that will never sprout.
Place ten seeds from a lot between damp paper towels. Keep them warm and moist for seven to fourteen days. Count how many sprout. If fewer than half germinate, plant that variety thickly this season rather than saving it. If most sprout, the lot is worth organizing properly.
There is no point building a beautiful labeling system around dead seed.
Step 2: Choose the Best Seed Storage Containers
The best seed storage containers keep moisture out and keep varieties separate. Three formats dominate home gardens, and each suits a different collector. The right choice depends on how many varieties you keep and how often you dig through them.
Boxes vs. Binders vs. Vial Systems
Format |
Typical Capacity |
Best For |
Main Drawback |
|---|---|---|---|
Cardboard or wooden box |
10-30 packets |
Small collections, one season of seed |
No moisture barrier; cardboard absorbs humidity |
Binder with page sleeves |
40-80 packets |
Flat reference and browsing |
Bulky on a shelf; sleeves tear at the holes |
Compartmentalized vial system |
60-120+ varieties |
Collections over 50 varieties |
Higher upfront cost; vials need labeling too |
A few mechanics worth knowing before you buy. Cardboard and paper breathe, which sounds good until you realize they also pull moisture from humid air and hold it against your seeds. Binders work well because flat packets stay visible, but the plastic sleeves are not airtight, so you still need a desiccant inside the binder case. Vial systems win on separation: each variety gets its own sealed tube, so one contaminated lot cannot spread to the rest.
Matching the Container to Your Collection Size
- Under 20 varieties: a single box plus silica gel is enough. Skip the expense of a system.
- 20-50 varieties: a binder with labeled sleeves keeps everything browsable without digging.
- Over 50 varieties: a compartmentalized vial system pays for itself in time saved. At that scale, a box becomes a pile and a binder becomes a wrestling match.
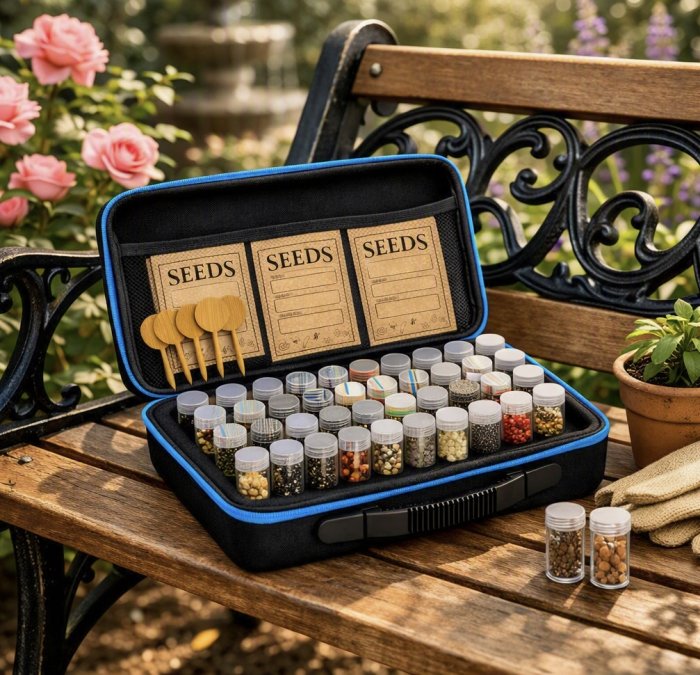
For anyone managing more than a handful of varieties, a compartmentalized vial system wins. The WALERICA Seed Organizer Kit from Moderno Top Shop holds up to 120 varieties in individual vials, with envelopes and labels included, so you are not buying components separately. “Setup takes minutes, and the water-resistant case helps protect your seed collection from moisture and everyday splashes.”

Step 3: Build a Seed Packet Labeling System
A seed packet labeling system is a consistent set of fields you record on every envelope, so any packet tells you everything you need without opening it. Consistency matters more than detail here: a half-filled label you always fill the same way beats a detailed label you fill differently every time.
What Every Label Should Include
- Common name and variety ("Tomato, Cherokee Purple")
- Botanical name, where known
- Harvest or purchase date
- Days to maturity
- Planting depth and spacing notes
- Source (saved, traded, or purchased)
How to Lay Out the Label So It Stays Readable
Write the variety name along the top edge in the largest letters you can manage. Put the date in a fixed corner, always the same corner, so you can scan a stack by date without reading every line. Group the growing notes (maturity, depth, spacing) together at the bottom. This fixed geography is what makes a stack of envelopes scannable at a glance.
Use a permanent fine-tip marker, not a ballpoint. Ballpoint ink sits on the surface of paper and smears when the envelope gets handled; permanent marker soaks in and survives. If you use adhesive labels instead, press them flat and avoid wrapping them around a fold, where they lift at the edges.
Making Your Own Envelopes and Labels
You do not need a kit to start. A standard sheet of paper folds into a small seed envelope with a few creases, and a printable template gives you uniform sizes so envelopes stack evenly. Print the template on plain paper, cut, fold, and glue one edge. Glassine envelopes, the translucent kind used for stamps, work especially well because they resist moisture better than plain paper and let you see the seed inside without opening them.
A Labeling Habit That Prevents Duplicates
Before you file a new packet, check your inventory notebook or spreadsheet first. Most duplicate seed purchases happen because a gardener forgot what was already in the box, not because they needed more. A quick glance at the inventory before buying saves the cost of a packet you already own.
Step 4: How to Store Vegetable Seeds by Category and Season
Knowing how to store vegetable seeds starts with grouping them the way you plant them. Split your collection by type first: vegetables, flowers, and herbs. Then sort each group by planting season.
Organizing by Planting Calendar
Build a simple calendar mapping each variety to its sow date and its days to maturity. A spring sowing of lettuce and a fall sowing of the same variety get different slots, even though it's one packet. Group cool-season crops together and warm-season crops together, and your spring planting becomes a matter of pulling one section rather than reading every label.
Step 5: Protect Your Seeds from Moisture and Pests
Moisture and insects destroy more home seed collections than age does. Both are preventable with the same three habits.
Keep relative humidity low by adding silica gel desiccant to every container, and replace the packets each season. Seal containers fully; a loose lid defeats the entire system. For pests, inspect incoming seeds before storage, freeze suspect lots for a few days to kill larvae, and keep containers off the floor where insects travel. Label the freeze date so you know which lots were treated.
Step 6: Sustainable and Recycled Storage Materials
You do not need to buy everything new.
Frequently Asked Questions
What is the best way to store garden seeds for long-term viability?
Store seeds in a cool, dark, and dry location with consistent temperatures between 32-50°F and low humidity. Use airtight containers with desiccant packets to absorb moisture. Paper envelopes work well for short-term organization, but place them inside sealed containers for long-term storage. Label each envelope with the variety name, harvest date, and germination rate. Check seeds annually and replace desiccant as needed to maintain viability.
How do you label seed packets for easy identification?
Include the plant variety, scientific name, harvest date, and days to maturity on every label. Add germination rate if you have tested the seeds. Use waterproof adhesive labels or write directly on paper envelopes with permanent ink. This seed packet labeling system lets you find any variety in seconds without opening envelopes.
How can you protect your seed collection from moisture and pests?
Use airtight containers with silica gel desiccant packets to control humidity. Store containers in a cool, dark place away from temperature swings. If you find pests, freeze affected seeds for 48 hours, then reseal in fresh envelopes with new desiccant.
Is a 120-slot seed organizer worth it if I only have 30 varieties?
A larger organizer gives you room to grow your collection without replacing the system later. The WALERICA Seed Storage Organizer Kit holds up to 120 varieties with individual vials, labels, and tools included for $49.99. Empty slots can store garden twine, plant tags, or extra desiccant. If you expand to 60 or 80 varieties in a few seasons, you will not need to buy another organizer.
