

How to Prevent Pests in Stored Seeds: 2026 Guide
Table of Contents
- How to Dry Seeds for Storage Before Pests Move In
- Seed Storage Temperature and Humidity: The Numbers That Stop Infestations
- Best Containers for Seed Storage to Block Insects and Moisture
- Step-by-Step: How to Prevent Pests in Stored Seeds
- Organic Pest Prevention: Natural Repellents That Work
- Visual Pest Identification: What's Eating Your Seeds
- How to Prevent Pests in Stored Seeds: Mistakes That Undo Your Work
- Frequently Asked Questions
Last Updated: September 10, 2026
How to Dry Seeds for Storage Before Pests Move In
If you want to prevent pests stored seeds from ever becoming a problem, the work starts before the seeds reach a container: moisture is the single biggest invitation for insects and mold. Gardeners often bag seeds while still damp and within weeks find weevils or mold. Drying seeds properly is the first and most important step in any seed storage plan.

The target is simple: seeds should snap rather than bend when you press them. For most vegetable and flower varieties, that means reducing internal moisture over one to three weeks in a warm, airy space, not a hot one. Heat above roughly 95°F can damage the embryo and reduce germination.
Testing Seed Moisture Without a Meter
You do not need a moisture meter. The salt test works for most home gardeners: put a few tablespoons of dry table salt in a small glass jar, add your seeds, shake for about 30 seconds, and let it sit. If the salt clumps or sticks, the seeds still hold moisture; if it stays loose, they are dry enough to store.
A simpler check is the snap test. Bend one large seed, like a bean or sunflower: a properly dried seed breaks with a clean snap, while one that bends or feels leathery needs more time. Smaller seeds should feel hard and rattle when you shake the jar.
Seed Storage Temperature and Humidity: The Numbers That Stop Infestations
Stored grain insects thrive in warm, humid conditions, and seed collections are no different. Temperature and relative humidity are the two numbers that matter most.
For long-term viability, aim for storage temperatures between 32°F and 50°F and relative humidity below 50%, ideally around 30-40%. At these levels, insect activity slows dramatically and mold cannot establish itself. A cool closet, basement, or refrigerator works well; a hot garage or shed does not.
The relationship between the two is what trips people up. Warm air holds more moisture, so a sealed container stored in a hot room can build condensation inside even if the seeds went in dry. The USDA's grain storage guidance notes that temperature and moisture work together, and controlling one without the other rarely solves the problem. If you can only manage one, prioritize a cool, stable temperature and keep the container sealed.
Best Containers for Seed Storage to Block Insects and Moisture
The best containers for seed storage are airtight, opaque, and sized to your collection, but most containers sold as airtight are not. Understanding what actually stops insects and moisture lets you judge any container on its own merits.
What "Airtight" Actually Means for Pest Prevention
Stored-product insects do not need a hole to get in, just oxygen, a food source, and a gap roughly the width of a grain of flour. A lid that snaps shut without compressing a gasket leaves that gap, as does a screw-top jar with a paper liner. What closes it is a compressible seal, rubber, silicone, or a tight-fitting gasket, that deforms against the rim when closed.
Once the seal is genuinely airtight, a second mechanism kicks in: hermetic storage. When insects consume the oxygen inside a sealed container, they produce carbon dioxide and eventually suffocate, the same principle behind commercial hermetic grain bags and sealed silos, scaled down to a jar. It is not instant, but it prevents an infestation from growing into a collection-wide problem.
Modified Atmosphere: The Next Level
For seed savers storing larger quantities, modified atmosphere storage takes hermetic sealing further by actively replacing the air inside the container. Commercial operations flush sealed bins with nitrogen or carbon dioxide to drop oxygen below the level insects and mold need. At home, the practical version is an oxygen absorber packet, a small iron-based sachet that chemically binds oxygen inside a sealed jar. Combined with a real gasket seal, it can hold a container at low oxygen for months, suppressing both insect activity and mold growth.
The trade-off: oxygen absorbers are single-use and lose effectiveness once exposed to air, so they must go into the container immediately after opening. They also do nothing if the seal leaks, so pair them with a gasketed container, not a zip-top bag.
Matching Container to Collection Size
| Container Type | Seal Mechanism | Blocks Light | Best For |
|---|---|---|---|
| Glass jar with rubber gasket | Compressible gasket | If amber or stored dark | Small collections, oxygen absorbers |
| Metal tin with tight lid | Friction fit | Yes | Medium collections |
| Compartment case with gasketed vials | Individual gaskets | If opaque | Many varieties, cross-contamination control |
| Vacuum-sealed bag | Heat seal | No | Bulk seed, short-to-medium term |
| Plastic bag or cardboard box | None | No | Never for storage |
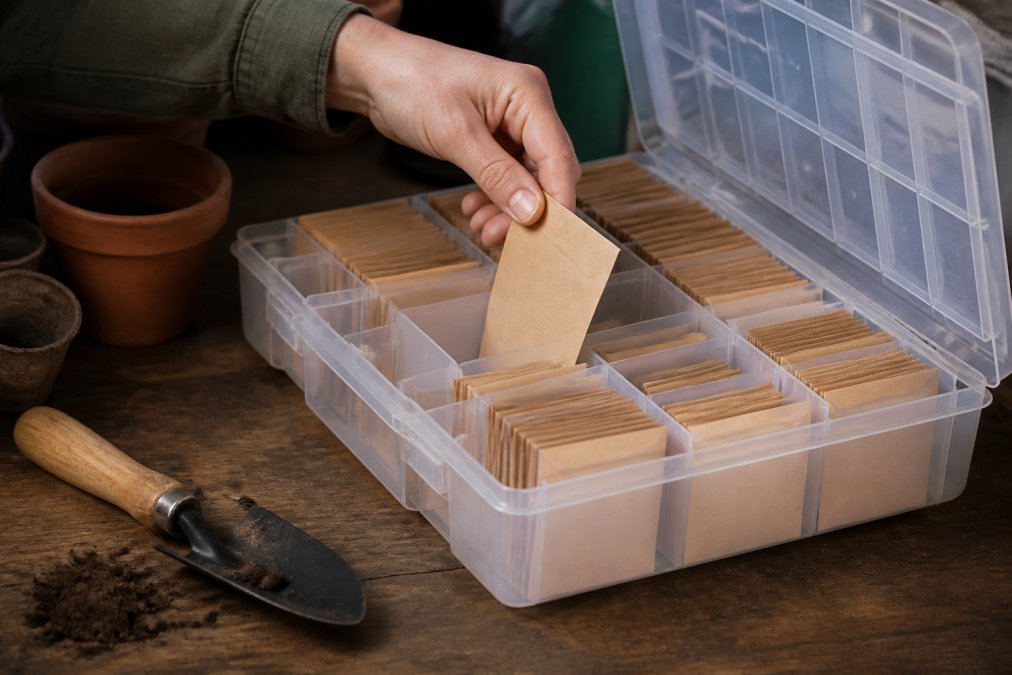
A compartment case with individually gasketed vials solves a problem the other options do not: it isolates each variety's air space. If one vial becomes infested, insects cannot move into the neighboring vial because there is no shared atmosphere. That isolation is the single most effective structural defense against cross-contamination.
Step-by-Step: How to Prevent Pests in Stored Seeds
To prevent pests stored seeds rely on three repeatable steps: sanitize, quarantine, and monitor. Skip any one and infestations find a way in.
Step 1: Clean and Sanitize Every Container
Empty every container completely, then wash it with warm soapy water and let it dry fully. Pay attention to the corners and lid threads, where insect eggs and grain dust collect. A wipe-down with white vinegar adds protection and leaves no chemical residue. Never reuse a container that held an infested batch without sanitizing it first.
Step 2: Inspect and Quarantine New Seeds
Before any new seeds join your collection, inspect them on a white sheet of paper for tiny holes, fine dust, or live insects. Then seal them in their own container and keep them separate for two to three weeks. This quarantine period is one of the most overlooked steps in seed storage and the cheapest insurance you can buy.
Step 3: Seal, Label, and Monitor Monthly
Seal each container tightly, label it with the variety and date, and store it in your cool, dark location. Then set a monthly reminder to check for signs of activity: webbing, dust, or live insects. Catching an infestation in one vial is a small problem; catching it three months later is a lost collection.
Organic Pest Prevention: Natural Repellents That Work
Organic prevention is not about finding a magic repellent; it is about making the storage environment hostile to insects without chemicals.
Diatomaceous earth is the most reliable: this fine powder damages the outer shell of insects that crawl through it and is safe around seeds, so sprinkle a thin layer in the bottom of each container. Bay leaves and dried lavender sachets discourage insects from settling but will not stop a serious infestation alone. Freezing is another organic option: seal new seeds in an airtight bag and freeze for about 72 hours to kill any eggs or larvae already present.
A common mistake is relying on a single repellent and skipping sanitation. No natural product compensates for dirty containers or damp seeds.
Visual Pest Identification: What's Eating Your Seeds
Most stored-seed problems announce themselves the same way: you open a container and something is moving, the seeds look dusty, or there is webbing you did not put there. Identifying the culprit matters because treatment and risk of spread differ by pest.
Weevils
Weevils are small, dark, hard-shelled beetles with a distinctive snout, roughly an eighth of an inch long and slow-moving. The damage signature is unmistakable: small, round exit holes in the seeds plus a fine flour-like dust at the bottom of the container. Larvae develop inside the seed, so by the time you see adults the damage is done. Weevils are the most common pest of stored beans, peas, and corn. If you find them, discard the affected seeds, larvae are still inside the apparently intact ones.
Grain Moths
Grain moths, including the Indian meal moth and the angoumois grain moth, are the ones that produce webbing. Adults are small, pale, and flutter rather than fly. Larvae spin silk threads across the seeds, and you will often see small cocoons stuck to the lid or sides of the container. The webbing is the giveaway, no other common stored-seed pest produces it. Moths are strong fliers, so isolate an infested container immediately.
Beetles
Flour beetles and their relatives are reddish-brown, elongated, fast-moving, and roughly a sixth of an inch long. Unlike weevils, they do not bore into whole seeds, they feed on cracked seeds, flour, and grain dust. That makes them a symptom as much as a cause: if you have flour beetles, you likely have damaged seeds or accumulated dust somewhere in the container.
Mites
Mites are the hardest to see because they look like nothing more than fine, slow-moving dust. They thrive in humid conditions and multiply fast. If seeds feel slightly sticky or have a faint musty smell, mites are a likely cause, a strong signal that storage humidity is too high, so treat the environment, not just the container.
Psocids (Booklice)
Psocids are tiny, pale, and often overlooked because they resemble specks of dust until they move. They feed on mold and microscopic fungi rather than the seeds themselves, so their presence is a direct indicator of excess moisture. Finding psocids is a humidity alarm: fix the moisture problem and they disappear; ignore it and mold will follow.
Quick Comparison
| Pest | Size | Damage Signature | What It Tells You |
|---|---|---|---|
| Weevil | ~1/8 inch | Round exit holes, flour dust | Larvae inside seeds; discard batch |
| Grain moth | Small, pale | Webbing, cocoons near lid | Strong flier; isolate room-wide |
| Flour beetle | ~1/6 inch | Fast-moving, feeds on dust | Cracked seeds or debris present |
| Mite | Microscopic | Sticky feel, musty smell | Humidity too high |
| Psocid | Tiny, pale | Looks like moving dust | Mold already present |
What to Do When You Find Them
Isolate the affected container first, move it away from healthy stock before anything else. Then identify the pest using the signatures above. For weevils and moths, discard the infested seeds; the damage is internal and the risk of spread is high. For beetles, mites, and psocids, the cause is usually debris or humidity, so clean the container thoroughly and correct the storage conditions before reusing it. In every case, check neighboring containers the same day.
How to Prevent Pests in Stored Seeds: Mistakes That Undo Your Work
Most failures trace back to a handful of avoidable errors: storing seeds before they are fully dry, which invites mold and insects; using containers that are not airtight, which defeats every other step; and mixing new and old seeds in the same container, which turns one infested packet into a whole-collection problem.
A fourth mistake is skipping labels. Without a variety name and date, you cannot track which batch is aging or showed signs of pests, and you lose the ability to rotate stock. Good labeling is part of pest prevention.
Pest-free seed storage is less about reacting to problems and more about building a system that prevents them: dry seeds, cool and stable conditions, airtight containers, and a monthly check you actually keep. Moderno Top Shop built the WALERICA Seed Storage Organizer Kit for exactly this routine, with 120 individual vials, included labels and envelopes, and a water-resistant case that protects against humidity. Get started with Moderno Top Shop and keep every variety protected, labeled, and ready for planting season.
Frequently Asked Questions
How do I know if my stored seeds have been compromised by insects?
Look for small holes in the seed coats, fine dust at the bottom of containers, or live insects moving when you open the lid. Webbing between seeds and a musty smell also signal an infestation. If you find these signs, discard affected seeds and sanitize the container with hot soapy water before reusing it.
What is the ideal moisture level to prevent mold and pest growth in seeds?
Keep seed moisture below 8% for most vegetable and flower varieties. Above 12%, mold and stored-product insects thrive. Test by pressing a seed with a fingernail: if it dents instead of cracking, it needs more drying. Store with a silica gel packet to absorb any residual moisture.
Can freezing seeds help eliminate potential pest eggs?
Freezing at 0°F for 48 to 72 hours kills most insect eggs and larvae without harming viable seeds. Seal seeds in an airtight container first to prevent moisture damage. After freezing, let the container reach room temperature before opening to avoid condensation. This method works well for small batches before long-term storage.
What are the most common pests that attack stored garden seeds?
Weevils, grain moths, beetles, and booklice are the main culprits. Weevils bore into seeds and lay eggs inside. Grain moths leave webbing. Beetles feed on broken seeds and dust. Booklice prefer damp conditions. Airtight containers and low humidity stop all four from reproducing and spreading through your collection.
