

Do You Need a Seed Organizer for a Small Collection?
Table of Contents
- Do You Really Need a Seed Organizer for a Small Seed Collection?
- What Makes the Best Seed Storage Containers
- How to Organize Garden Seeds Without Breaking the Bank
- Environmental Factors That Protect Seed Viability
- Seed Viability Testing: How to Know If Your Seeds Will Grow
- When a Dedicated Organizer Makes Sense for Your Garden
- Frequently Asked Questions
Last Updated: September 18, 2026
Do You Really Need a Seed Organizer for a Small Seed Collection?
The short answer is no, you don't absolutely need one. But here's what changes when you get organized: your seeds stay viable longer, you plant what you actually own, and you stop buying duplicates. A seed organizer small collection solves real problems that cardboard boxes and plastic bags create over time.
Most gardeners start small. You grab a few packets from the store, toss them in a drawer, and forget about them until spring. Then you dig through a chaotic pile, find seeds that won't germinate, and waste time replanting. The frustration isn't about the number of seeds, it's about control.
Whether you're managing 30 varieties or 120, the same principles apply: protect your seeds from moisture and light, label everything clearly, and track what you have. A dedicated seed organizer makes this effortless.
The real question isn't whether you need one. It's whether the cost and space are worth the peace of mind. Let's break down when an organizer actually makes sense for your situation.
What Makes the Best Seed Storage Containers
The best containers share three non-negotiable features: they block light, control moisture, and keep seeds accessible. Your seeds don't care if the container is fancy or cheap, they care about the environment inside.
Airtight containers are essential. Seeds need low humidity to stay viable long-term. Moisture triggers germination, which wastes the seed's energy before you're ready to plant. A proper seal prevents moisture from creeping in.
Opaque or dark containers matter just as much. Light exposure degrades seed viability over time. Clear plastic boxes look nice on a shelf, but they're slowly killing your seeds. Choose containers you can't see through, or store them in a dark cupboard.
Temperature stability is the third factor. Fluctuating temperatures stress seeds. A cool, dark closet beats a sunny windowsill every time. Ideally, seeds stay between 40-50°F, but room temperature works fine if it stays consistent.
What separates a good seed storage setup from a mediocre one:

- Compartmentalized design that keeps varieties separate
- Durable materials that won't degrade after a few seasons
- A labeling system that's easy to read and update
- Enough capacity for your collection plus room to grow
Commercial storage containers range from small plastic boxes to elaborate wooden cabinets. DIY options using repurposed materials work just as well if you follow the moisture and light rules. The price difference matters less than the protection level.
How to Organize Garden Seeds Without Breaking the Bank
Organization doesn't require spending much money. The key is creating a system you'll actually use. A system you abandon costs more than any organizer because you'll buy duplicate seeds and plant expired ones.
Start by gathering what you have. Pull out every seed packet, envelope, and loose seed you own. Spread them on a table. This inventory step takes 20 minutes and reveals exactly what you're working with.
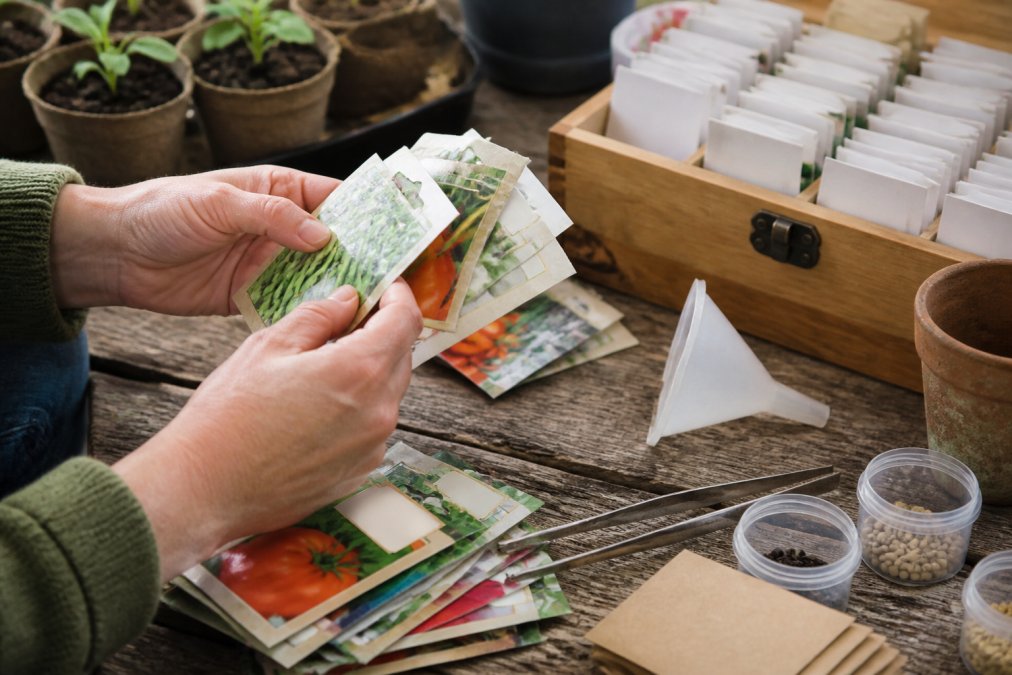
DIY Seed Storage Solutions Using Recycled Materials
You probably have storage options sitting in your kitchen right now. Glass jars with tight lids work beautifully. Mason jars, pasta sauce containers with good seals, and old spice bottles all function as seed vials. The only requirement is that they seal tightly and block light.
Small cardboard boxes work for short-term storage if you keep them in a cool, dark place. Egg cartons organize seeds by variety. Repurposed film canisters, mint tins, and small plastic containers from takeout all serve as compartments. The biodegradable appeal of cardboard is nice, but it won't protect seeds from humidity the way sealed plastic or glass does.
A wooden box with dividers costs less than 20 dollars to build or buy used. Line it with dark fabric or paint the interior black to block light. Add small compartments using cardboard dividers or wood strips. This setup holds 30-50 varieties depending on the box size.
The advantage of DIY solutions is flexibility. You customize the layout to fit your space. The disadvantage is time. Building a system takes effort, and homemade containers sometimes fail to seal properly, letting moisture in.
WALERICA Seed Storage Organizer Kit →
Budget-friendly storage ideas that actually work:
- Glass mason jars with tight-fitting lids
- Repurposed spice containers and mint tins
- Small plastic vials from craft stores (bulk packs are cheap)
- Wooden boxes with dividers (build or buy used)
- Egg cartons for temporary organization
- Old filing cabinets for larger collections
Labeling and Tracking Your Seed Varieties
Labels are where most DIY systems fail. You organize everything perfectly, then forget what's in each container by next season. Handwritten labels fade. Adhesive labels peel off in humid conditions. A good labeling system is the difference between an organized collection and a mystery box.
Write directly on containers with a permanent marker if they're dark. Use waterproof labels for anything that might get wet. Include the seed variety name, planting date, and expected germination rate if you know it.
A simple spreadsheet tracks your inventory. List each variety, quantity, purchase date, and location in your storage system. Update it each season. This takes 10 minutes to set up and saves hours of searching later.
Digital photos of your seed collection work as backup. Photograph each section of your organizer with labels visible. Store the photos on your phone or cloud storage. If you forget what you have, you can reference the photos instantly.
Environmental Factors That Protect Seed Viability
Seeds are dormant living things. They respond to their environment. Three primary factors determine how long seeds stay viable: temperature, humidity, and light exposure. However, how you manage these factors depends heavily on your local climate.
Temperature is the biggest factor. Cool temperatures slow the seed's metabolism, keeping it viable longer. Every 10-degree drop in storage temperature roughly doubles how long a seed stays alive. This is why refrigerators and freezers work so well for long-term seed storage. However, temperature consistency matters more than absolute coldness. Fluctuating temperatures, like those in an unheated garage or attic, stress seeds and reduce viability faster than a stable room-temperature closet. If you live in a climate with extreme seasonal swings, a basement or interior closet provides more stable conditions than exterior walls or spaces near heating vents.
Humidity kills seeds faster than anything else. Moisture triggers germination before you're ready to plant. It also promotes mold and fungal growth. Keep humidity below 50 percent. However, humidity management is climate-dependent.
Climate-specific storage strategy:
- Arid climates: Focus on light and temperature control; use sealed containers to prevent over-drying; store in a cool closet or basement.
- Humid climates: Prioritize desiccant packets and airtight seals; refrigerator storage is ideal for long-term preservation; inspect monthly for mold or pest activity.
- Temperate climates: A dark, cool closet works well; replace desiccant packets annually; monitor for temperature fluctuations near heating or cooling vents.
- Hot climates: Refrigerator or freezer storage is strongly recommended; avoid garages or sheds where temperatures exceed 70°F regularly; use heavy-duty desiccant packets.
Seed Viability Testing: How to Know If Your Seeds Will Grow
Old seeds might still germinate, or they might be dead. A quick viability test tells you which ones are worth planting. This saves you from wasting garden space on seeds that won't sprout.
When a Dedicated Organizer Makes Sense for Your Garden
A dedicated seed organizer becomes worthwhile when DIY solutions stop working. If you're spending 20 minutes searching for a specific seed packet, or if you've bought the same variety twice because you forgot you had it, an organizer saves money fast.
| Situation | Best Storage Solution | Cost | Time to Set Up |
|---|---|---|---|
| Under 30 varieties, casual gardener | Repurposed containers + spreadsheet | $0-15 | 30 minutes |
| 30-60 varieties, organized gardener | DIY wooden box or plastic organizer | $20-40 | 1-2 hours |
| 60-120 varieties, serious grower | Dedicated seed organizer kit | $40-80 | 15-30 minutes |
| 120+ varieties, seed preservation focus | Multi-unit system with digital tracking | $80+ | 1+ hours |
Frequently Asked Questions
Is a dedicated seed organizer necessary for a small home garden?
Not always. A seed organizer becomes valuable once you have 20-30 varieties, especially if you save heirloom seeds or plan multiple planting seasons. For fewer than 15 varieties, recycled containers with clear labels work fine. However, a dedicated organizer prevents moisture damage, keeps seeds organized by planting season, and saves setup time each spring. The WALERICA Seed Storage Organizer holds 120 varieties at $49.99, making it cost-effective if you plan to expand your collection or want protected storage in one portable system.
What are the best environmental conditions for storing vegetable seeds?
Vegetable seeds stay viable longest in cool, dry conditions: ideally 40-50°F with humidity below 50%. Airtight containers with desiccant (like silica gel) protect against moisture. Store in a dark location away from light exposure, which degrades germination rates. Temperature stability matters more than extreme cold, fluctuating temperatures between 70°F and 90°F reduce longevity faster than consistent cool storage. A basement, refrigerator, or dedicated seed organizer with compartmentalized storage helps maintain these conditions year-round.
How can I test if my stored seeds are still viable before planting?
The simplest viability test is the germination test: place 10 seeds on a damp paper towel, roll it up, place it in a warm spot (70°F), and check after 7-10 days. Count how many sprout, if 8 of 10 germinate, your germination rate is 80%, still acceptable for most gardens. Alternatively, soak seeds in water for 24 hours; viable seeds sink while dead seeds float. For heirloom or older seed packets, this test is essential before relying on them for your main planting season.
What happens if I just use plastic bags or envelopes to store seeds?
Plastic bags and paper envelopes expose seeds to moisture, light, and temperature fluctuations, cutting viability by 30-50% annually. Seeds stored this way often fail to germinate when you need them. Airtight containers with opaque, compartmentalized design dramatically extend seed longevity. A dedicated organizer like the WALERICA system ($49.99) includes sealed vials, labels, and clips that keep each variety isolated, dry, and labeled, eliminating the frustration of forgotten varieties or degraded seeds when planting season arrives.
